
This post contains affiliate links. As an Amazon Associate I earn from qualifying purchases.
We all know how kids clamor for their favorite candy at checkout, but delivered on a silver platter…? Nothing says treats like permission, and this treat board just screams, “Kids, I know what you like.” Sub in their colorful favorites or pick up exactly what’s in the recipe, it’s sweetness all the way in this kids birthday charcuterie board.
WANT TO SAVE THIS?
Steps + Photos to make this kids birthday charcuterie board
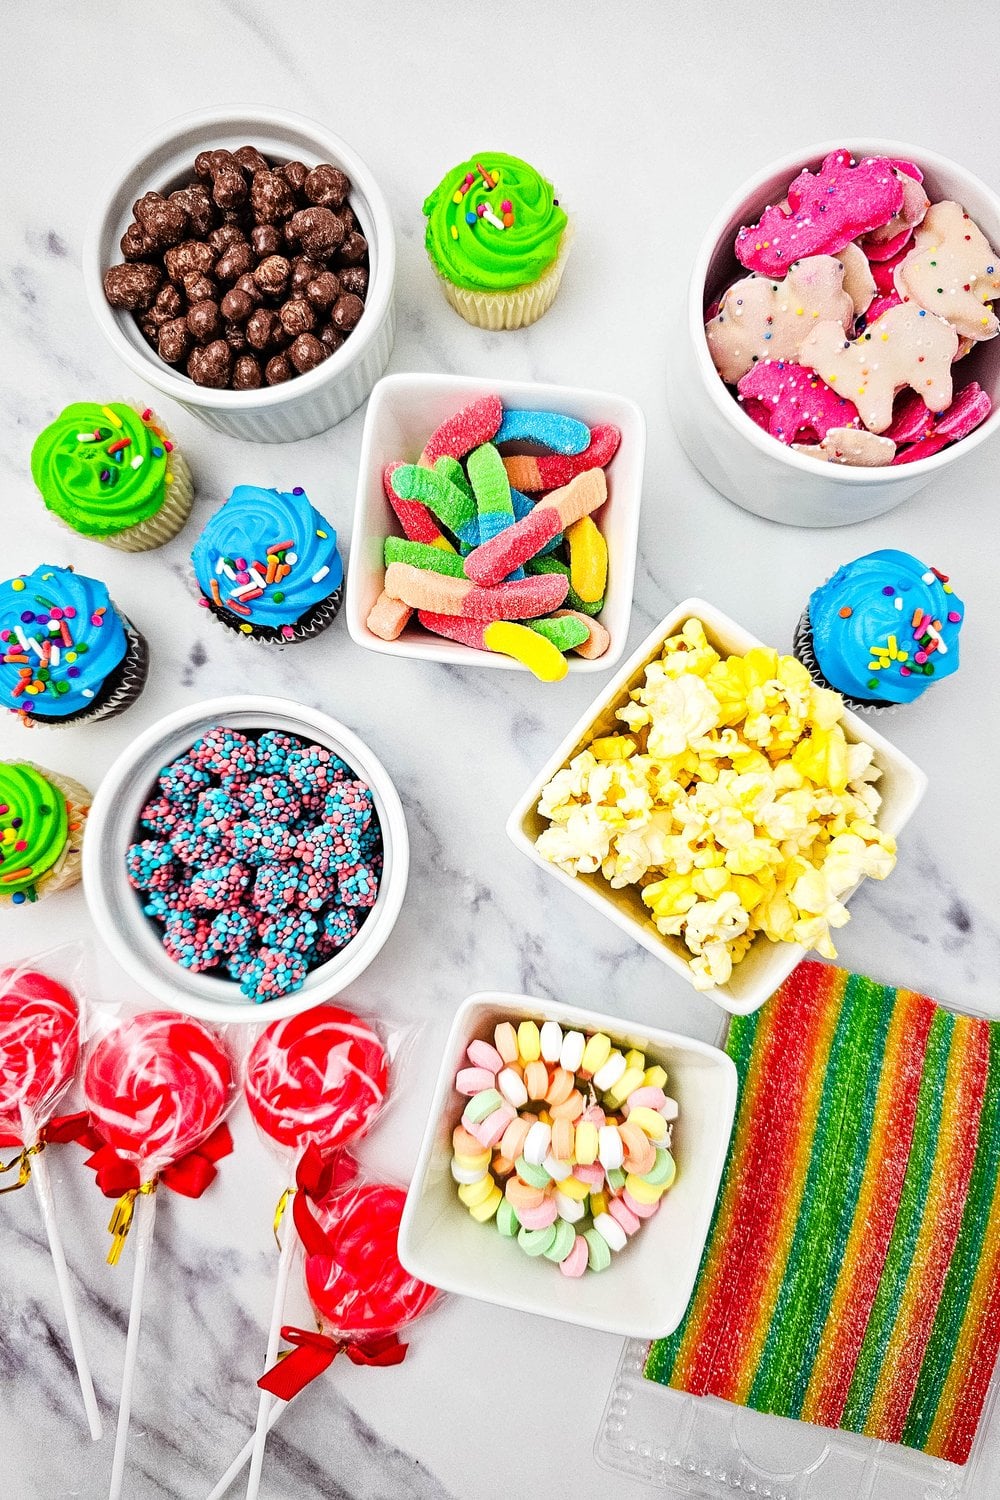
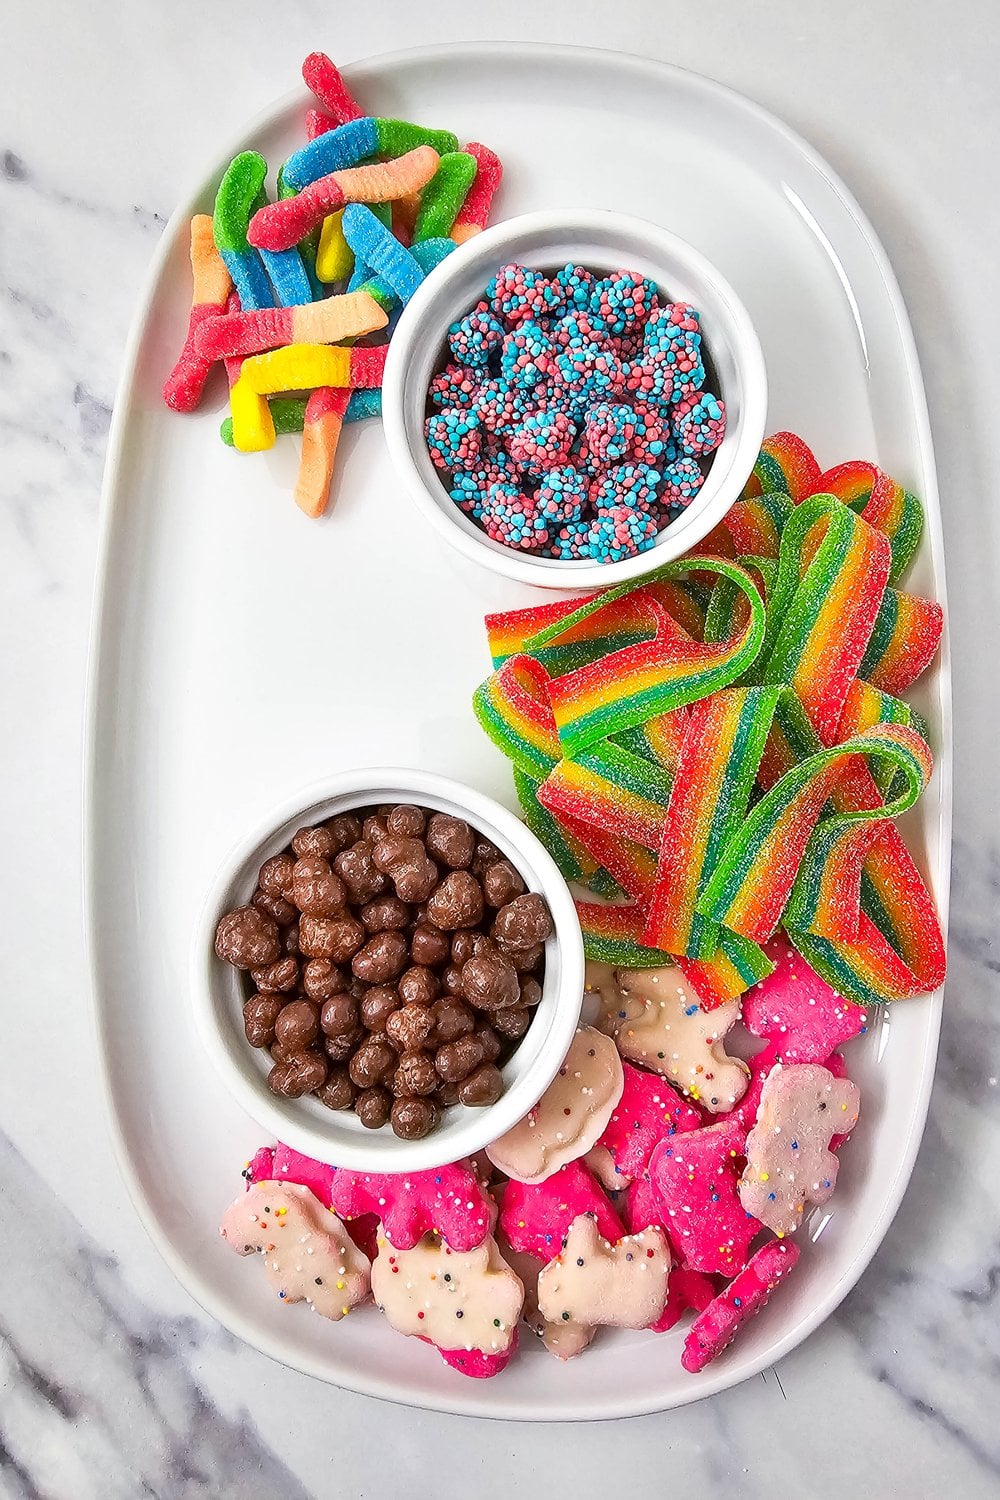
Step 1: Gather all ingredients
Gather and measure out all the ingredients so assembly goes quickly. Portioned and ready before you start building the board keeps the layout intentional instead of random. Maybe have a few extra of everything for taste-testing.
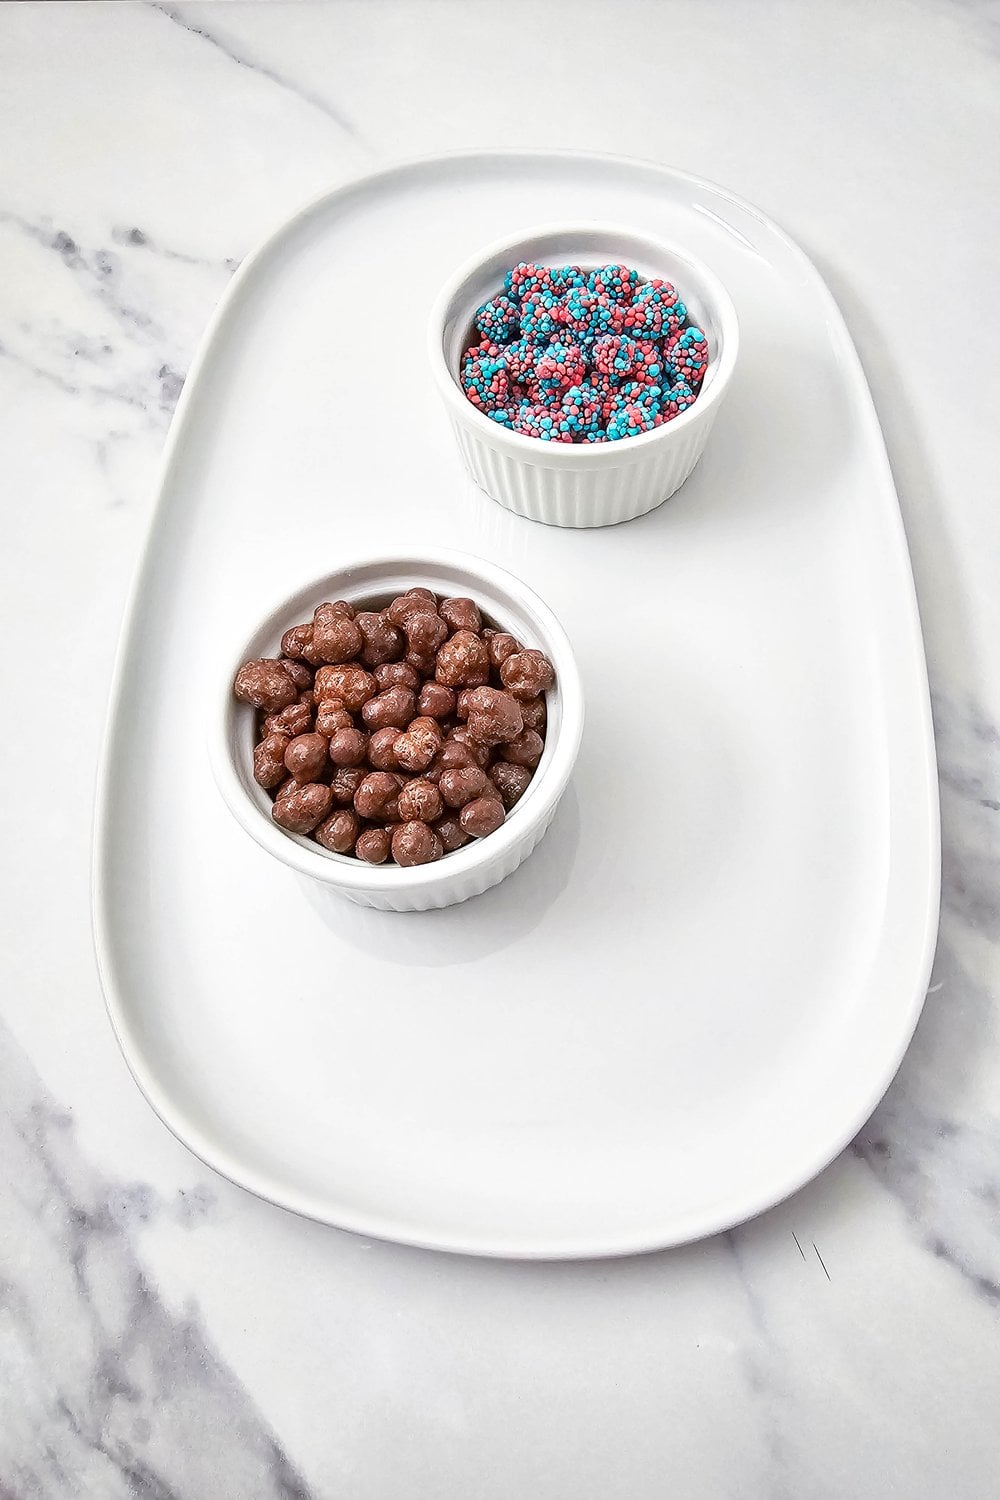
Step 2: Place the ramekins
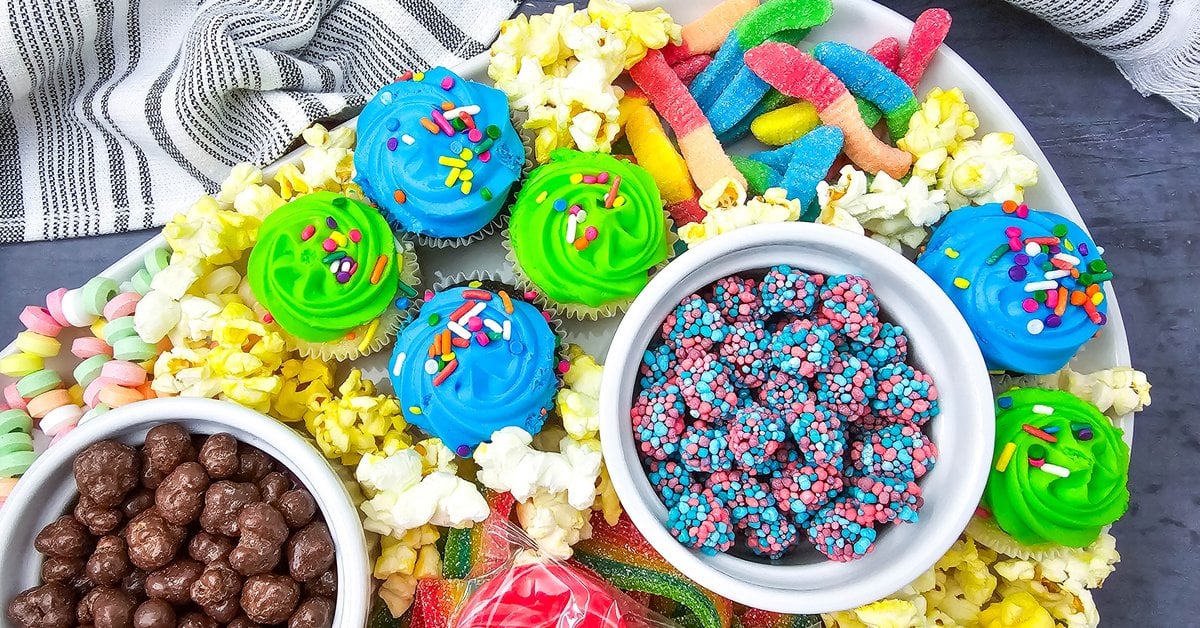
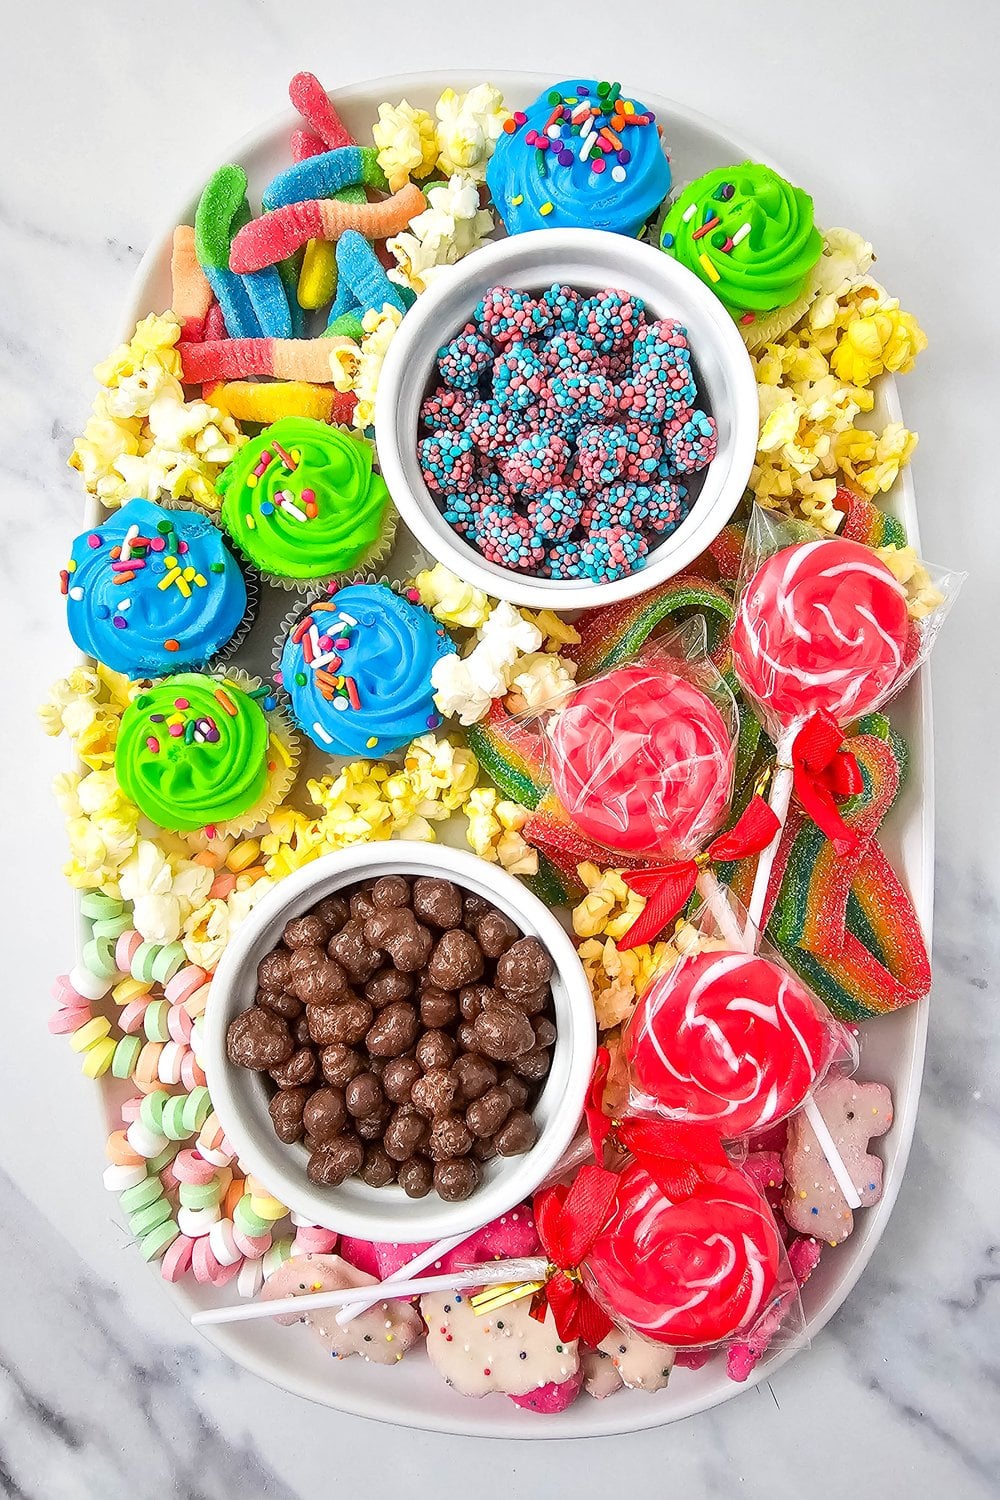
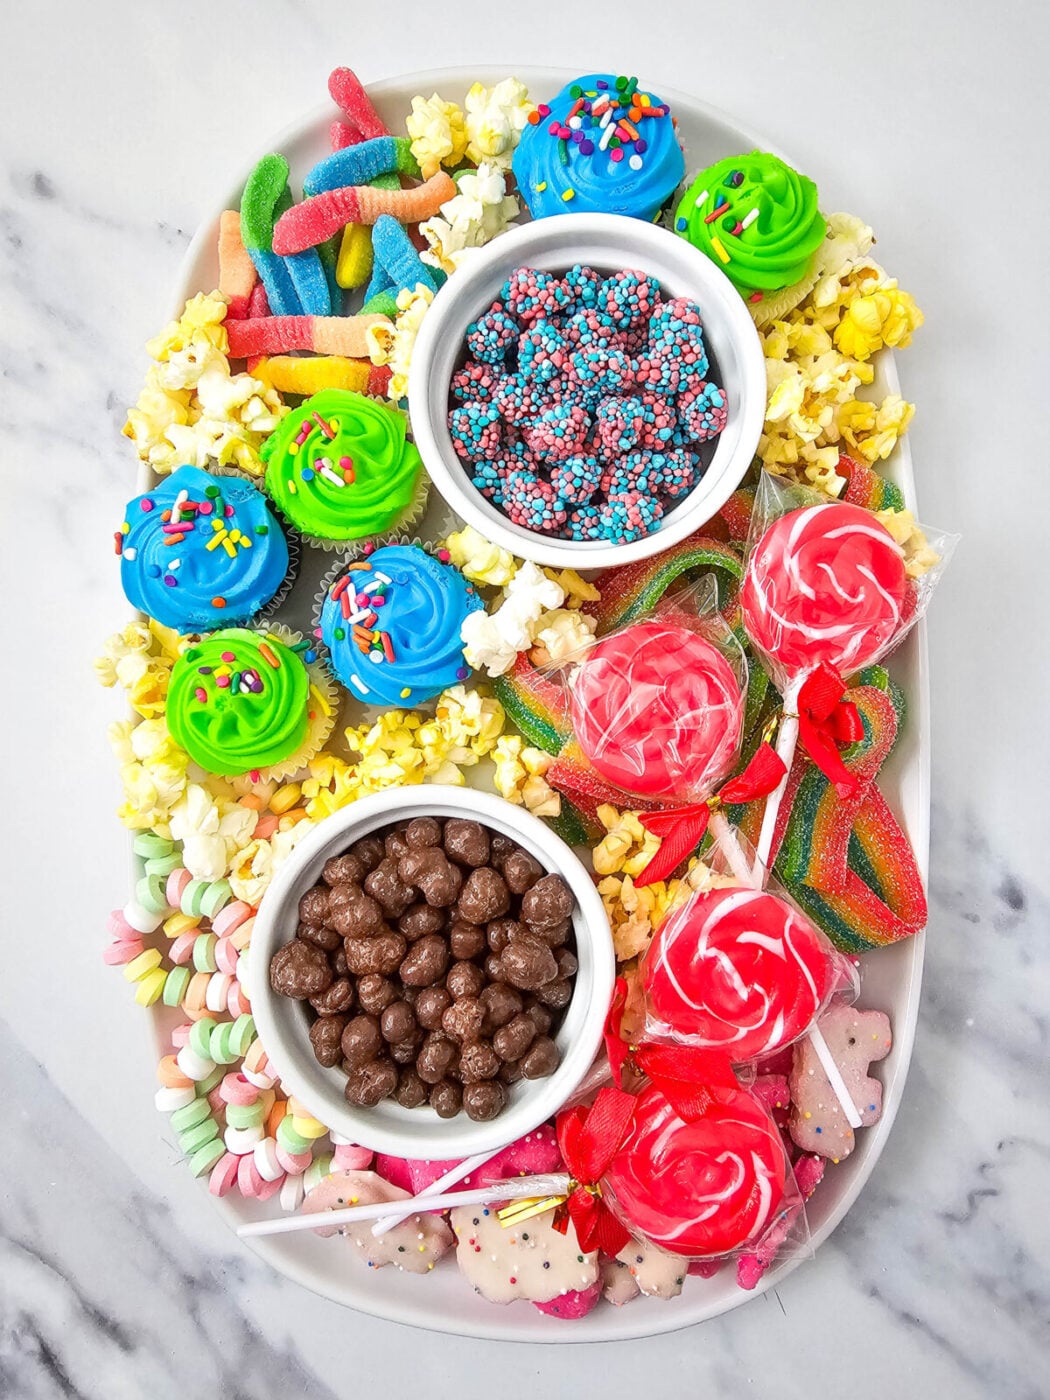
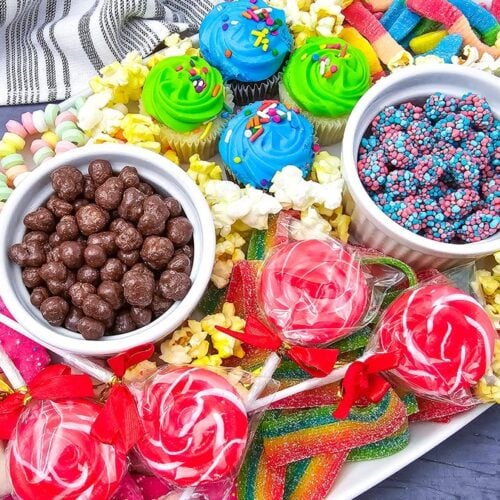
Fill one ramekin with Nerds Clusters candy and the other with Buncha Crunch candy. Place the Nerds ramekin toward the top right of the platter, leaving a couple of inches of space above and to the side. Place the Buncha Crunch ramekin in the bottom left in a similar position.
Speaking of ramekins: White ceramic ramekins are in these photos, but I found some colorful food-safe melamine ramekins here. Less likely to break around excited kiddos. Amazon affiliate link.
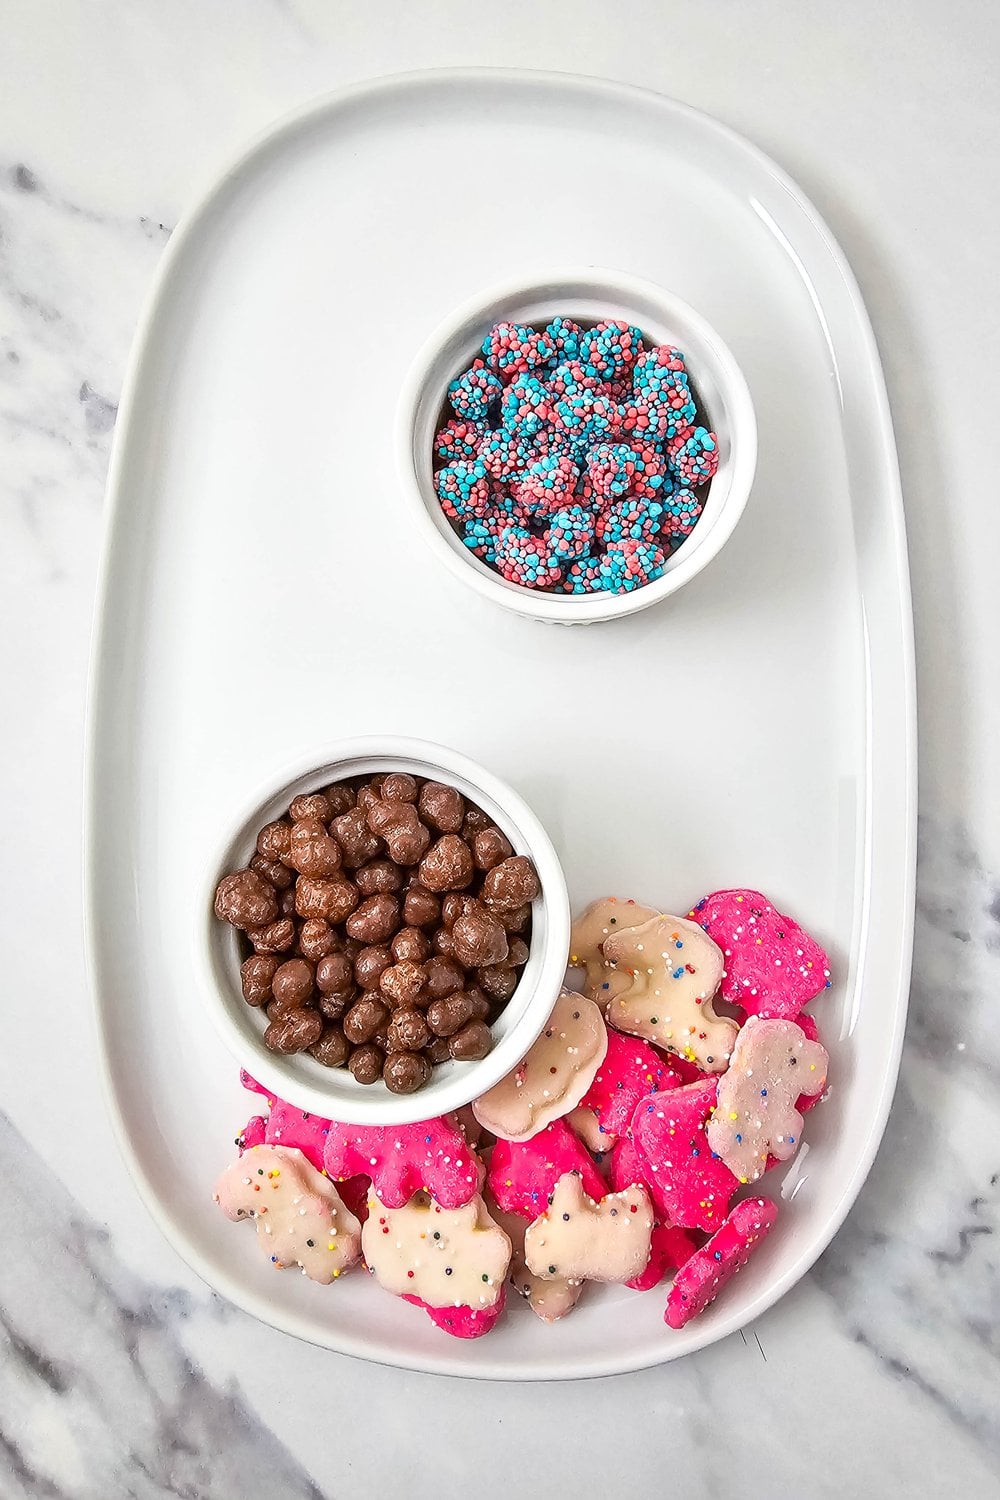
Step 3: Arrange the Circus Animal Cookies
Arrange the Circus Animal Cookies at the bottom of the platter, tucking them under the Buncha Crunch ramekin and up the side of it a little bit. The cookies create a colorful base layer that fills the bottom section of the board.
While their Circus Animals are available year-round, Mother’s also makes some really cute seasonal cookies. Check out our Valentines Day Bark using the Puppy Love cookies and Mighty Dynamite Dinosaur Chocolate Bark.
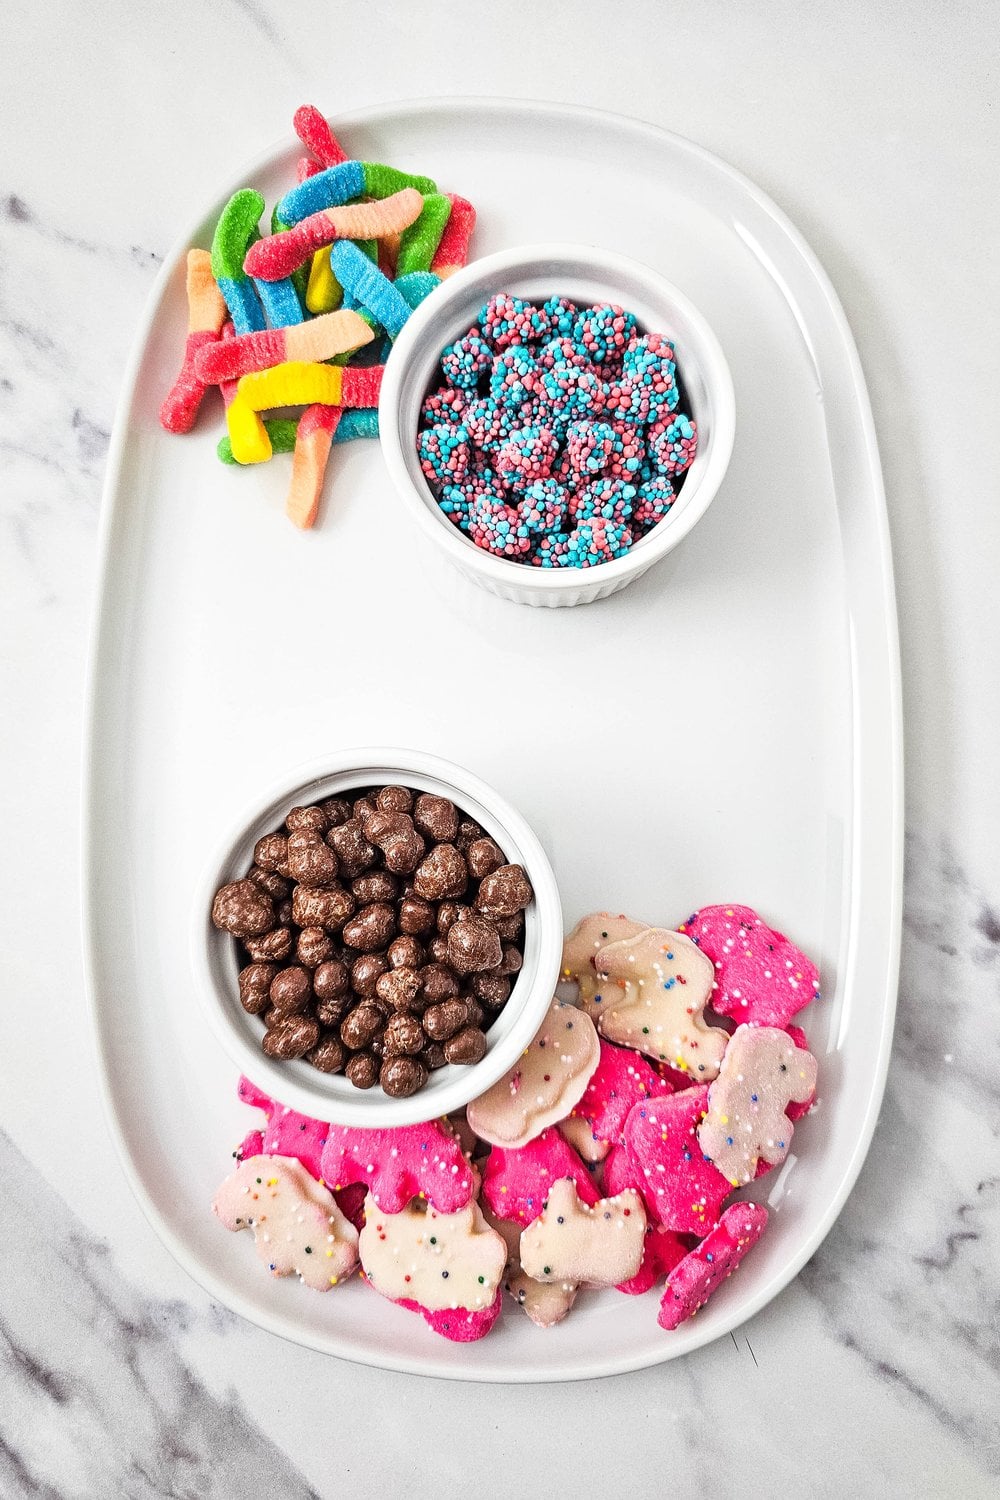
Step 4: Add the sour gummy worms
Arrange the sour gummy worms in the top left corner of the platter. Let them drape naturally so they look playful rather than stacked.
I love sour worms. I have a bag of the Trolli Sour Crawlers in the pantry right now.
Step 5: Place the Airheads
Arrange the Airheads Extreme Rainbow Berry strips on the right side of the platter, folded over and piled up. The bright colors and long shape fill vertical space well.
I made the cutest Beach Cupcakes using candy strips like these. Check it out here.
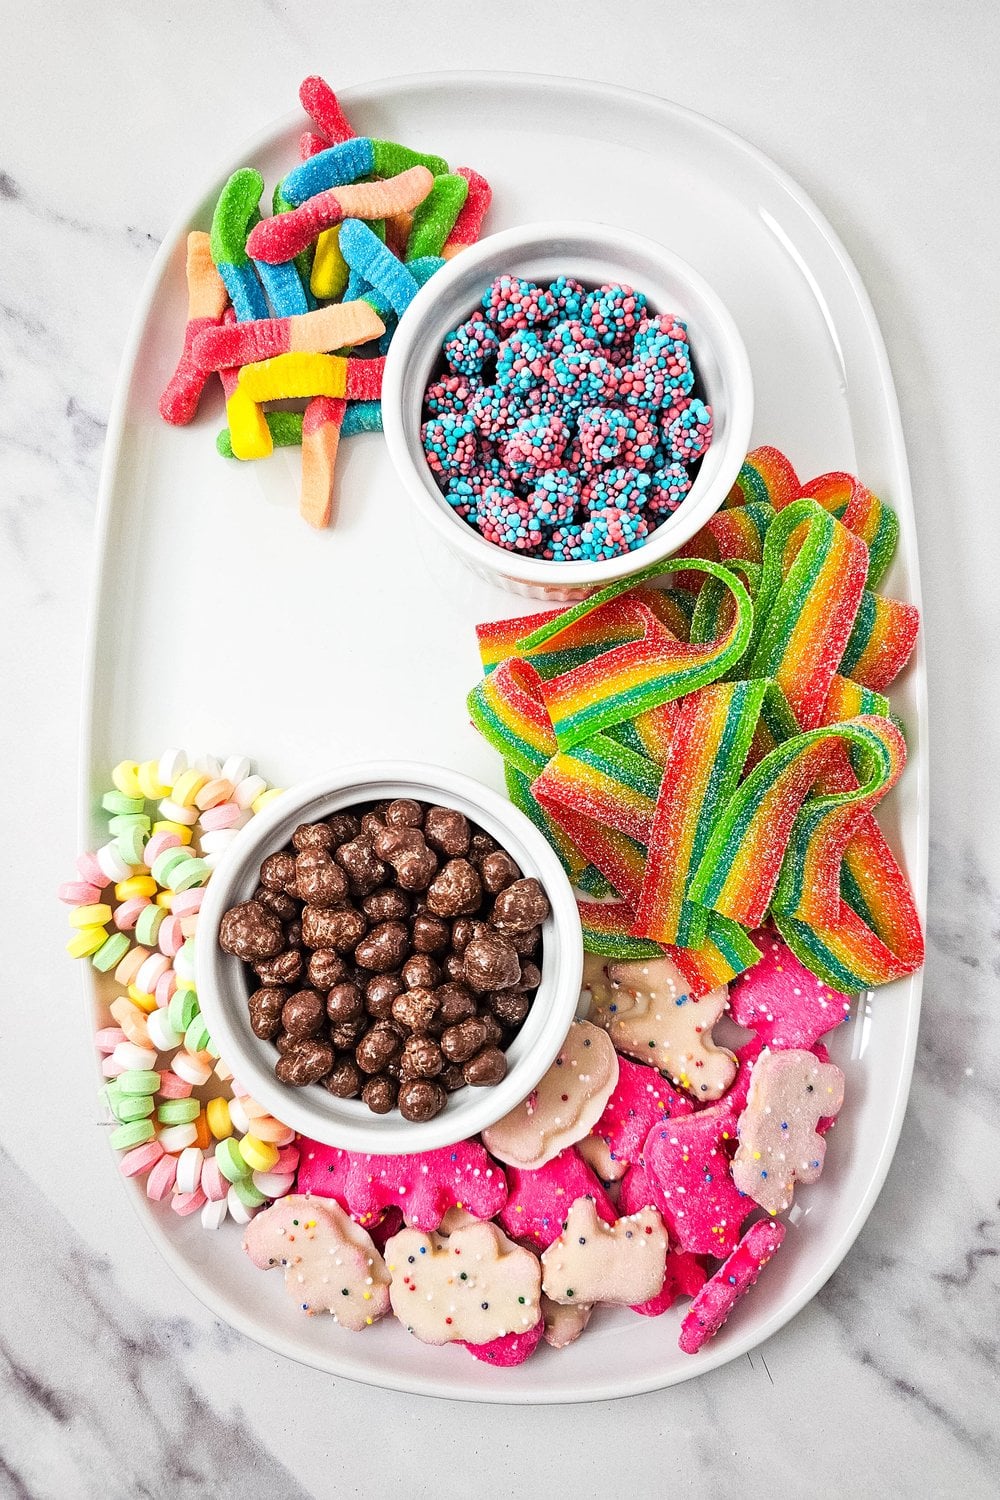
Step 6: Add candy bracelets
Place the candy bracelets on the bottom left of the platter. They double as wearable party favors, too.
Sharks
Unicorns
Multicolor
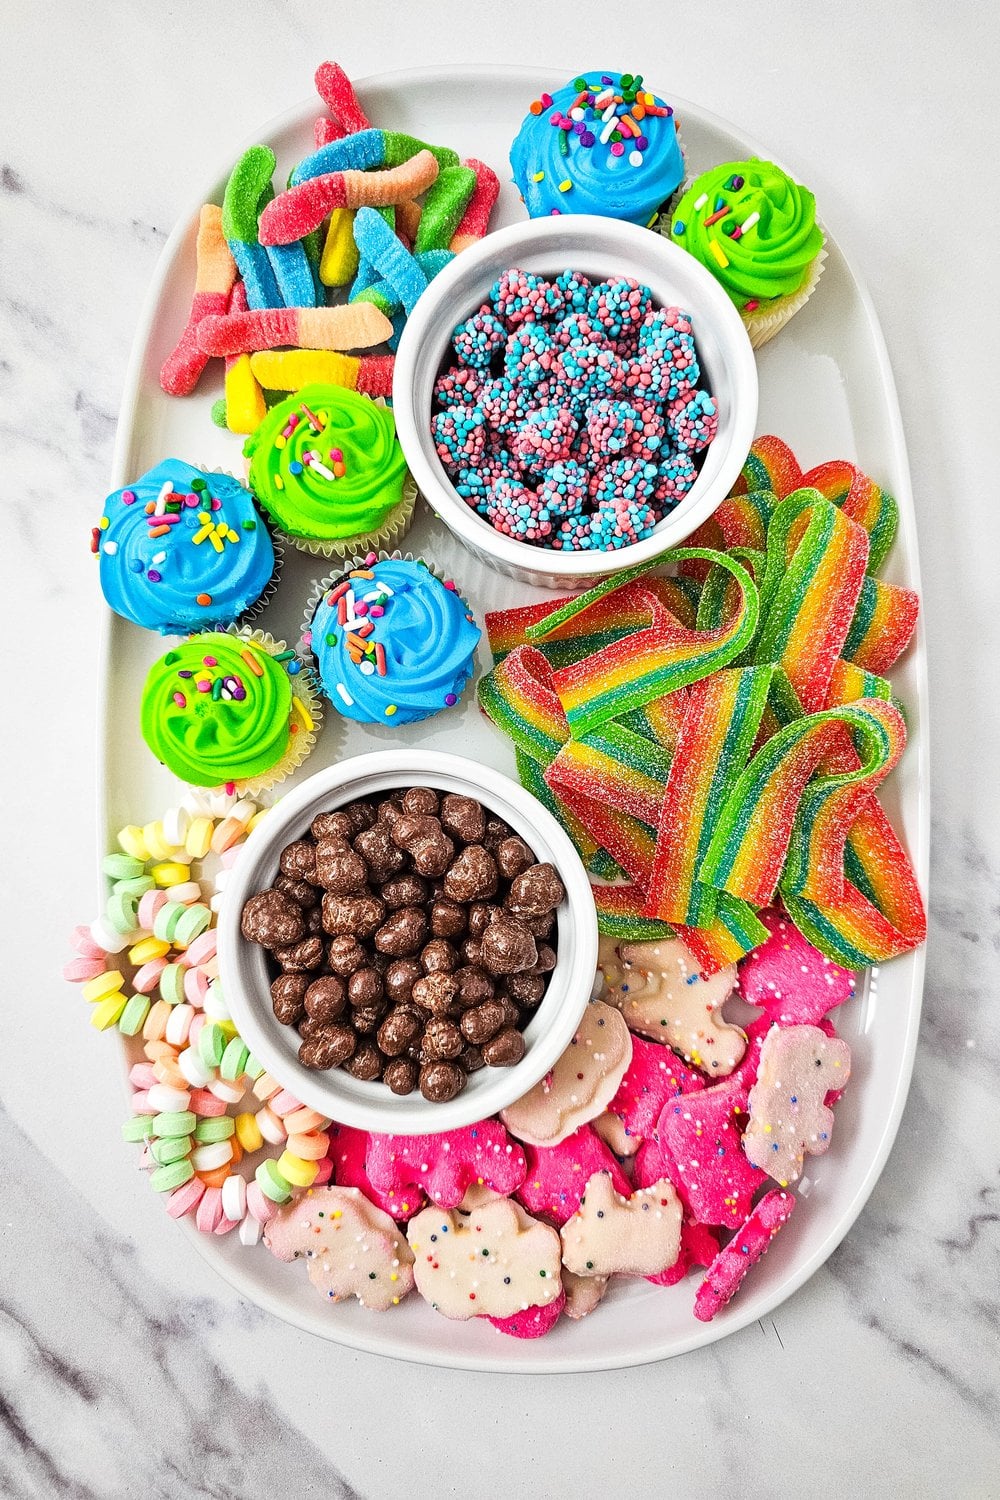
Step 7: Set the mini cupcakes
Set the mini cupcakes down in the open space on the middle left and across the top of the platter. They are the tallest item on the board, so placing them after the flat candies keeps the height balanced.
(Time-saver tip: Buy the cupcakes at the grocery store bakery—you can buy as many as you need in the birthday kid’s favorite flavor.)
Step 8: Fill gaps with popcorn
Fill in any visible gaps on the board with clusters of popcorn pieces. Popcorn is the perfect filler because it is light, neutral, and tucks into tight spaces without shifting the heavier items around.
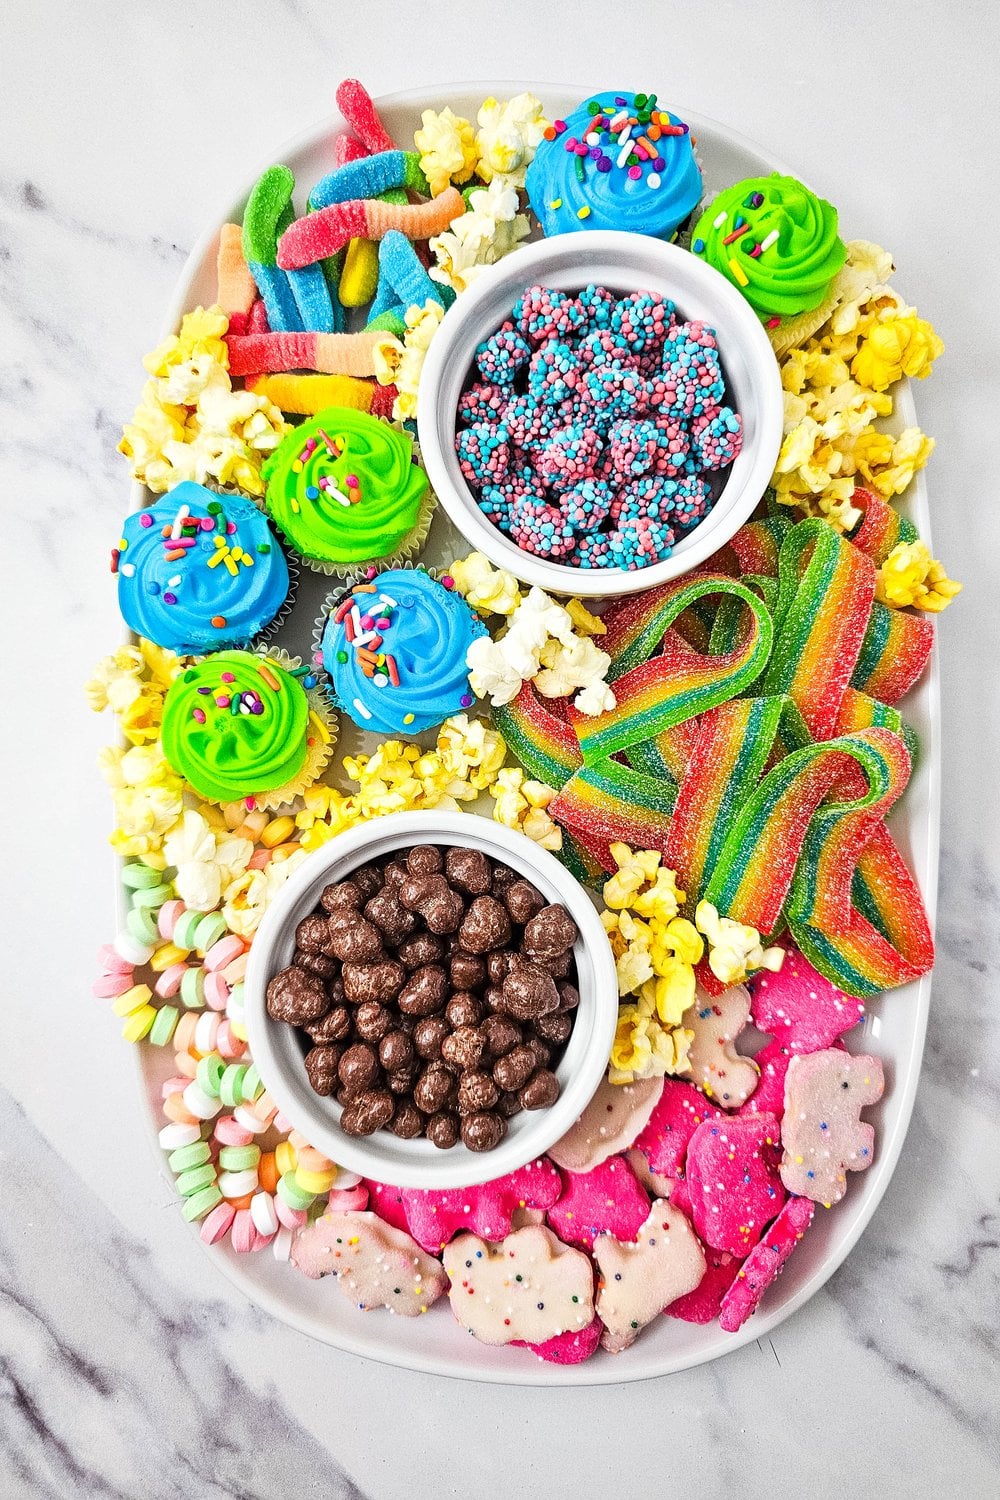
Step 9: Arrange the lollipops
Arrange the lollipops along the right side of the platter, from the middle down. Angle them so the sticks fan outward slightly and the candy heads sit against the board items. Note: If you want to avoid sticks altogether, you can leave off the lollipops and it will still be a cute board.
Step 10: Final check and serve
Step back, check for any bare spots, and serve.
Tools and Equipment
- 8×12 inch oval platter or board (set of 4 in white)
- 2 small ramekins or bowls (colorful melamine ramekins
- Kitchen shears to open packaging (we love our Wusthof shears)
- Measuring cup
Tips for Success
Build in sections. Start with the ramekins as anchors, then work outward. Placing the largest or most structured items first (ramekins, cupcakes, cookies) gives the smaller candy something to lean against.
Match the candy to the birthday kid. The recipe uses a mix of sour, sweet, crunchy, and chewy, but the whole point is customization. Swap sour gummy worms for Swedish Fish, trade Buncha Crunch for M&Ms, or add Goldfish crackers if the birthday kid prefers salty over sweet. Keep the ratio of about 8 to 9 items so the board looks full without overflowing.
Keep it tidy. Keep the extras handy if you need to refill a spot where the popular stuff disappeared first. If you really want to avoid frosted cupcakes altogether, make cake pops—a little sweet with far less mess. My recipe for white cake balls are a finger-food/no sticks required simple dip into a white chocolate coating that sets nicely.
Go bigger for more guests. This serves 6 to 8 on an 8×12 platter. For a larger party, move up to a 12×16 board, double the candy portions, and add 6 more cupcakes. Or for even larger party servings and access, I will put down wax paper (butcher or parchment works too) and tape it down over a small card table surface, part of a kitchen island, or even the picnic table if you are keeping the fun outside. The whole surface area becomes usable and food-safe, just keep a 6-inch border from the edge to discourage stray candies.
Prep ahead by up to two hours. Everything except the cupcakes and popcorn can sit at room temperature without issue. Place the cupcakes and popcorn within thirty minutes of serving. Cupcake frosting softens in heat, and popcorn goes stale in the open air.
Storage: Leftover candy stores separately in airtight bags or containers for up to a week. Don’t store the assembled board because moisture from the cupcakes will soften the cookies and popcorn. Hard to imagine leftovers with a kids-only treat tray, though.
WANT TO SAVE THIS?
Kids Birthday Charcuterie Board
Ingredients
- 1 cup Circus Animal Cookies
- 6 mini cupcakes
- 1 1/2 cups popcorn prepared
- 1/2 cup Nerds Clusters candy
- 1/2 cup sour gummy worms
- 1 package Airheads Extreme Rainbow Berry 4.5 oz
- 1 box Buncha Crunch candy 3.2 oz
- 6 candy bracelets
- 4 lollipops
Instructions
- Gather and measure out all ingredients.
- Fill one ramekin with Nerds Clusters and the other with Buncha Crunch. Place the Nerds ramekin toward the top right of the platter and the Buncha Crunch ramekin in the bottom left.
- Arrange Circus Animal Cookies at the bottom of the platter, under and alongside the Buncha Crunch ramekin.
- Place sour gummy worms in the top left corner.
- Arrange Airheads Extreme Rainbow Berry strips on the right side in the middle.
- Place candy bracelets on the bottom left.
- Set mini cupcakes in the open space on the middle left and at the top.
- Fill any gaps with clusters of popcorn.
- Arrange lollipops along the right side, from the middle down.
- Serve and enjoy.
Notes
The bottom line
This kids birthday charcuterie board is fifteen minutes of arranging candy on a platter, and it becomes the thing every kid at the party heads for first. No oven, no stovetop, no stress. Circus Animal Cookies, mini cupcakes (buy them from the grocery store bakery to save even more time), and handfuls of the birthday kid’s favorite candy is all it takes to build a birthday party charcuterie board. Swap the candy to match any theme, scale it up for bigger parties, and let the birthday kiddo help build it if they want in on the action.
Looking for kid-friendly dinner ideas too? Here’s my list for homemade but still kid-approved.