

This post contains affiliate links. As an Amazon Associate I earn from qualifying purchases.
I discovered these cherry pie bars when I wanted all the flavors of cherry pie without wrestling with pastry dough. 🥧 The buttery sugar cookie base holds sweet cherry filling beautifully, and that glaze drizzle makes every bite absolutely divine. Summer baking just got so much easier!

WANT TO SAVE THIS?
Steps to make Homemade Cherry Pie Bars
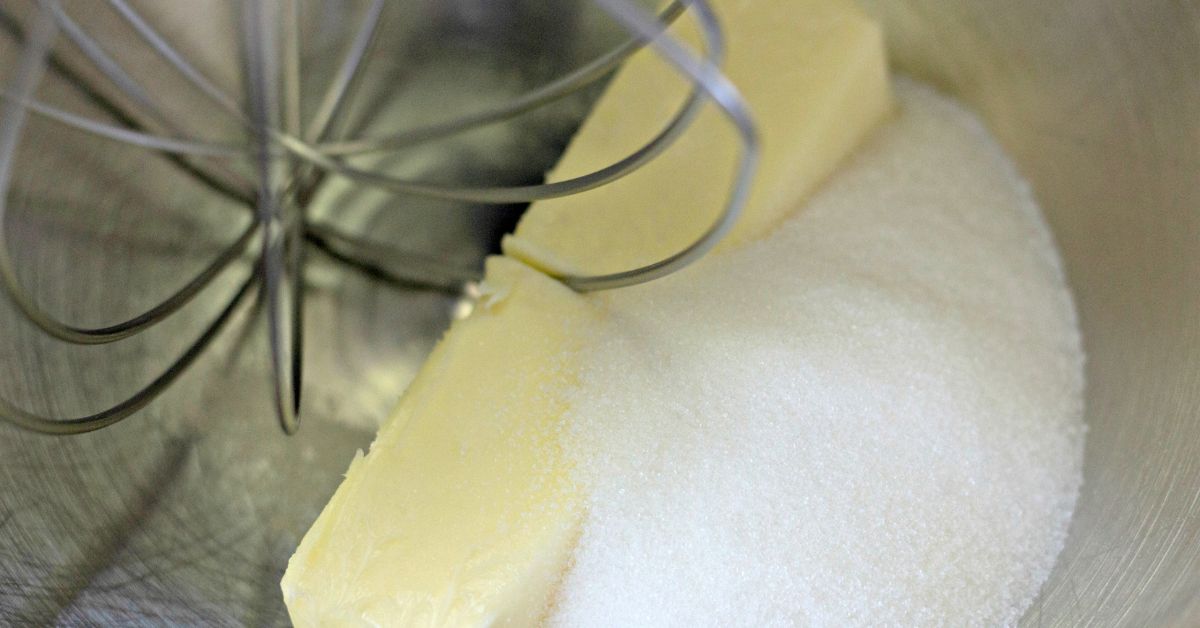
Step 1: Set out your butter to soften. Gather ingredients.

Step 2: Add soft butter and sugar to your mixing bowl.
Step 3: Cream together and add eggs.
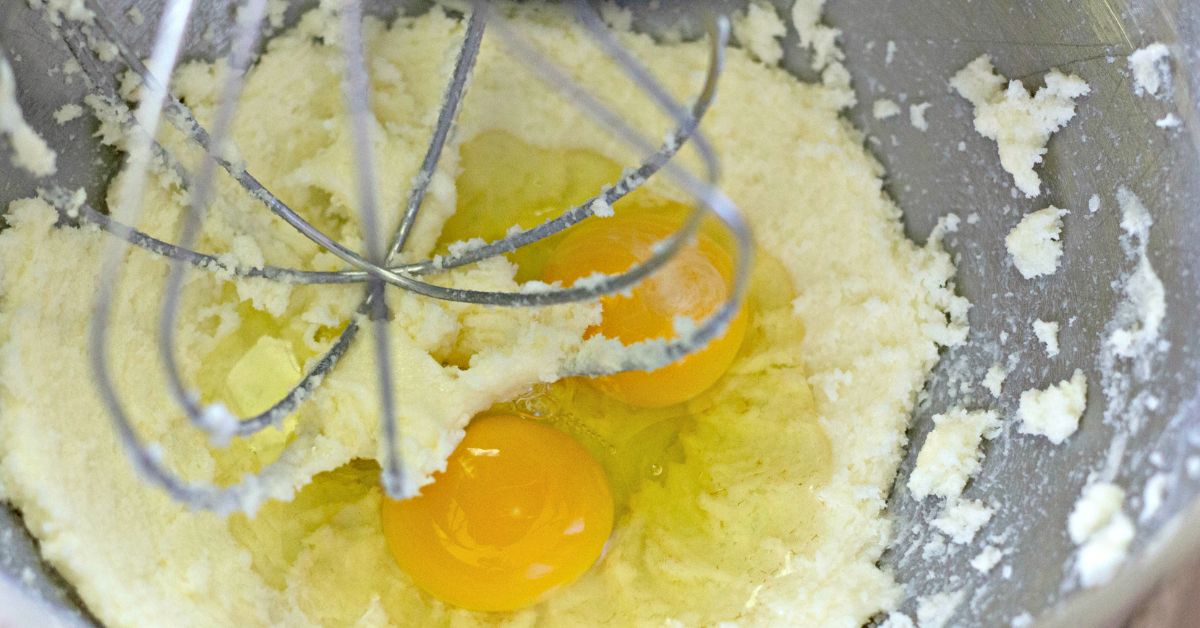
Step 4: Beat on low; don’t overmix. Dough will be moist like cookie dough. Reserve ½ cup of the dough and set aside.

Step 5: Dollop most of the dough onto the prepared baking dish.

Step 6: Use the back of a spoon or offset spatula to get the dough all the way to the edges evenly.

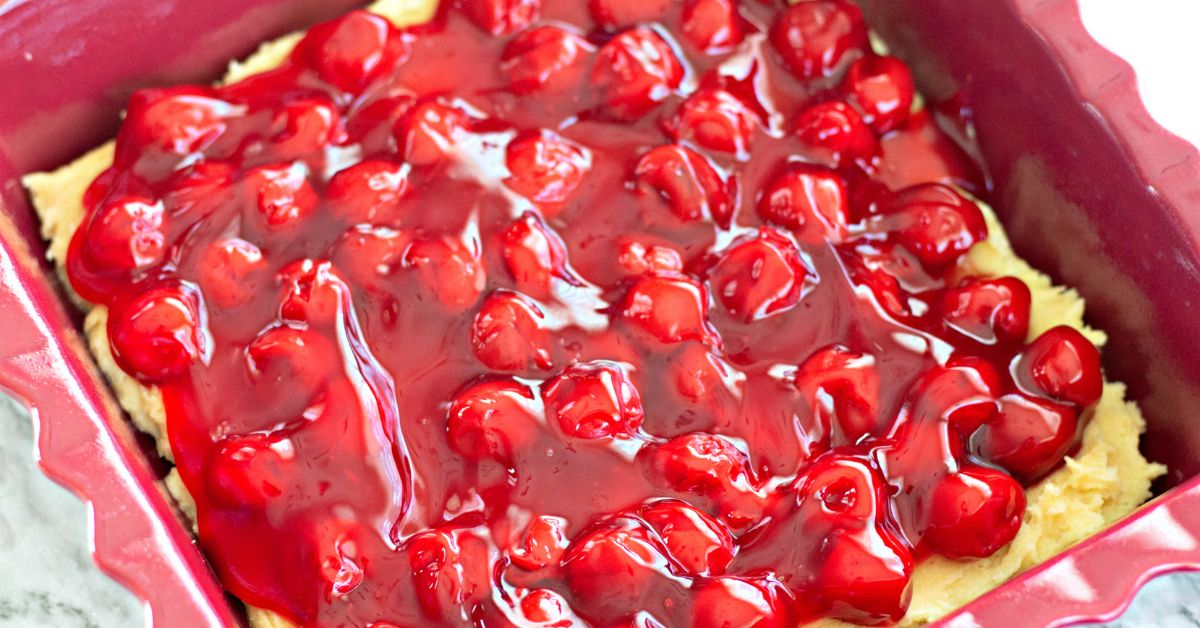
Step 7: Add the pie filling, leaving a bit of space between crust and pan. Sweet filling tends to burn when it touches the pan sides.
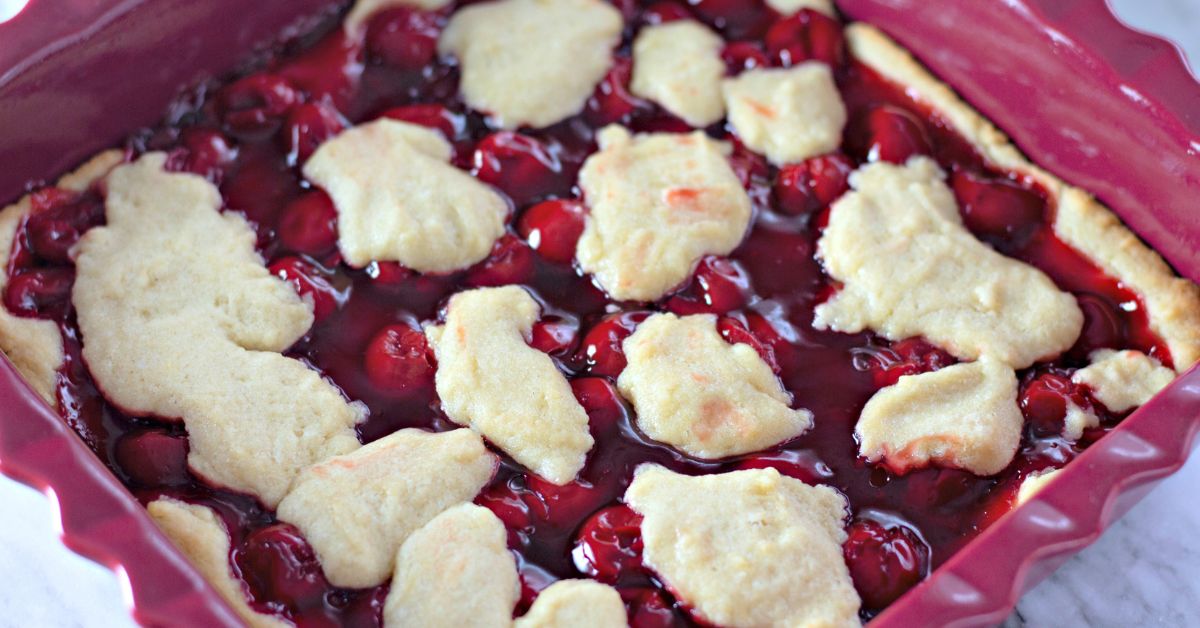
Step 8: The remaining ½ c of dough goes on in dollops. Use your spoon to “dot” the top with the rest of the dough.

Step 9: It won’t be super brown when it comes out of the oven, but you can see how the dough will flatten and turn a bit golden.
Step 10: Set aside the hot pan to cool. Prepare the glaze in a small bowl.
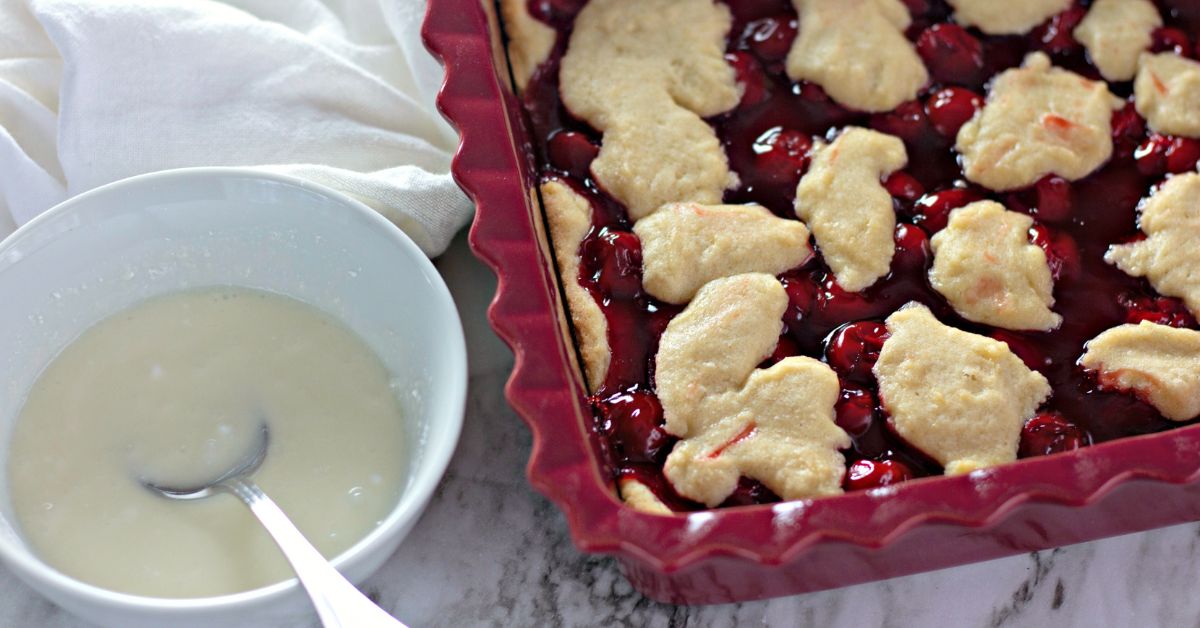
Step 11: After the bars have come to room temp: With a spoon, stream the glaze across the top.

Step 12: Cut into bars. This will make about 9 full size bars, but if you need more servings, use a sharp knife to make 2-inch bite-sized pieces.
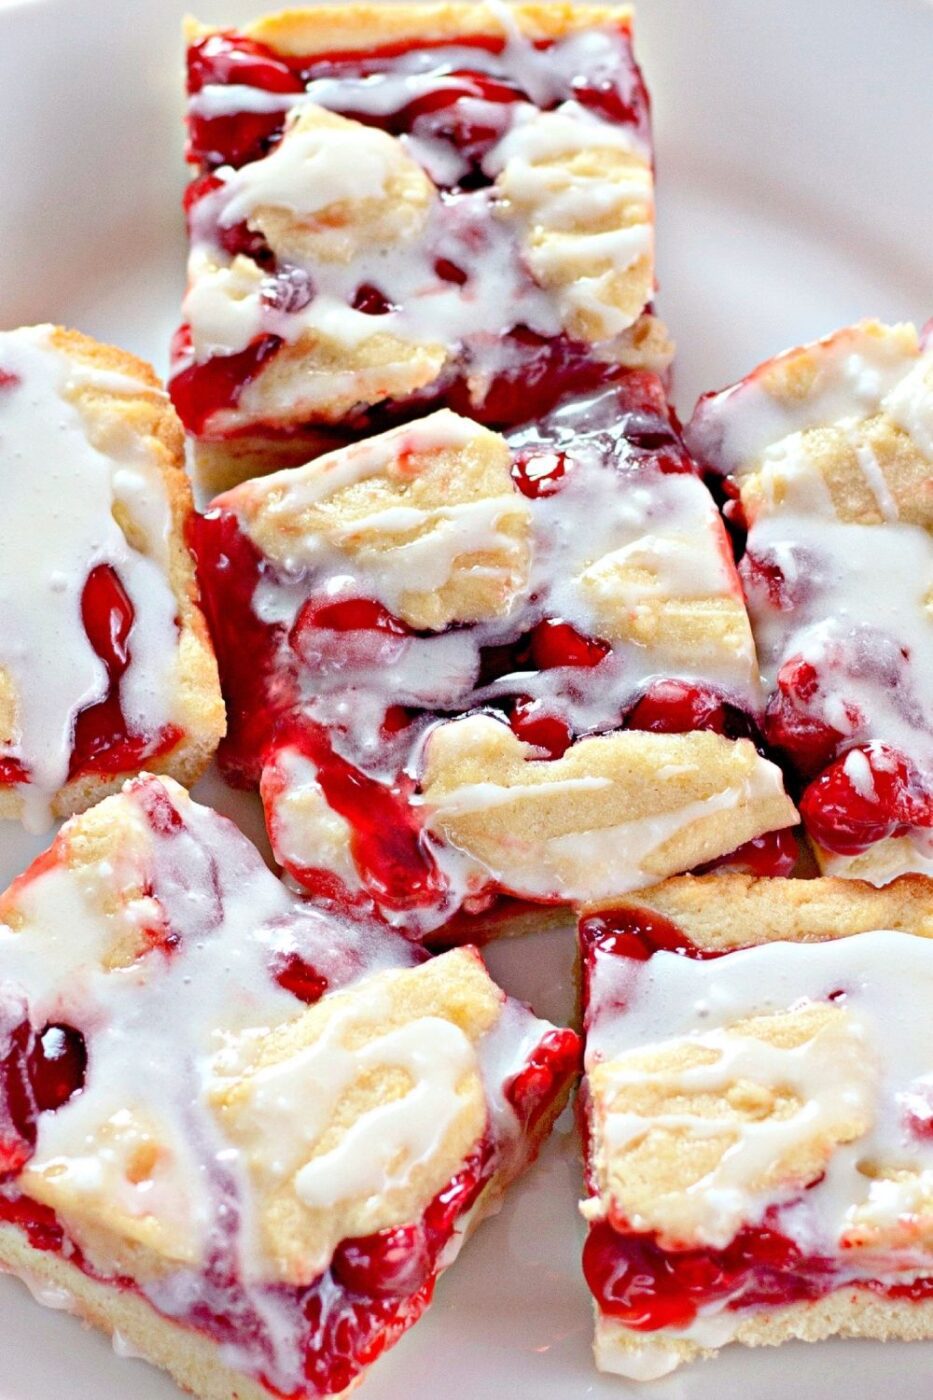
Step 13: These make a finger-food-friendly cherry dessert squares with a sugar cookie crust without cream cheese. Enjoy!

Tools & Equipment
- 8×8 inch square baking pan
- Non-stick cooking spray
- 2 medium mixing bowls
- Wire whisk
- Electric mixer (hand or stand mixer)
- Measuring cups and spoons
- Offset spatula or back of a spoon (for spreading dough)
- Small bowl (for glaze)
- Wire cooling rack (optional but recommended)
- Sharp knife (for cutting bars)
Tips for Cherry Pie Bar Success 🌟
- Notes about substitutions: I’m a fan of using what I have on hand, so if you have a 9×9 glass dish, small cookie sheet, or a brownie pan instead of an 8×8, make do. You can use a sheet of parchment paper instead of spray if you’d like but it will shift a bit as you spread the dough. For a gluten-free crust, use cup-for-cup GF flour. We like Mightylicious GF All Purpose.
- Filling feelings: I personally use extra-cherry pie filling because I love that concentrated cherry flavor. This would also be good with any other fruit pie filling, TBH. I make my own strawberry compote with fresh berries that you might find less sweet.
- Master the dough spreading: That bottom layer can be tricky! My favorite method involves dolloping small spoonfuls of dough across the entire pan bottom, then using the back of a big spoon or offset spatula to gently spread to the edges.
- Don’t skip the cooling step: I know it’s tempting to cut into these fruit dessert bars while they’re warm, but letting them reach room temperature ensures clean cuts and bars that hold their shape perfectly.
- Enhance your glaze: Consider adding 1/8 teaspoon of flavoring to your powdered sugar glaze for an extra flavor boost. Whatever’s in your pantry: vanilla or lemon extract, fiori di sicilia (orange-vanilla), almond, even chocolate extract
- Storage success: These bars actually taste even better the next day! Store them covered at room temperature for up to 3 days, or refrigerate for up to a week.
- Serving suggestions: Cut these summer fruit bars into smaller rectangles or even 1-in squares if you need to feed a lot of people or offer just a taste of the good life. I love serving these at summer potlucks and whatnot: July Fourth celebrations, cookouts, or anytime I need a dessert that travels well or serves a crowd without requiring plates and forks. (Maybe a napkin or two!)
WANT TO SAVE THIS?
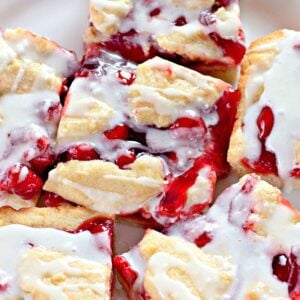
Homemade Cherry Pie Bars
Ingredients
- 1 ½ cups all-purpose flour
- ½ teaspoon salt
- ½ cup butter softened (we love Challenge butter)
- ½ cup sugar
- 2 eggs
- 1 teaspoon vanilla extract
- ½ teaspoon almond extract
- 1 21 oz can cherry pie filling (try this with other fruit too, like apple or raspberry)
- ½ cup powdered sugar
- 1 tablespoon milk
- Optional: Additional ⅛ teaspoon extract of your choice for the glaze: vanilla almond, lemon, fiori di sicilia (orange-vanilla), pandan, or even chocolate
Instructions
- Prep your workspace: Preheat your oven to 350°F and grease an 8×8 inch square baking pan with non-stick cooking spray. This size creates perfectly thick bars that hold together when cut.
- Mix the dry ingredients: In a medium mixing bowl, whisk together the flour and salt, then set this mixture aside. I always combine my dry ingredients first to ensure even distribution.
- Create the base: In another medium mixing bowl, cream together the softened butter and sugar with an electric mixer until the mixture becomes light and fluffy – this usually takes about 3-4 minutes. Add the eggs one at a time, then beat in the vanilla and almond extract until everything combines smoothly.
- Bring it together: Add your flour mixture to the wet ingredients and mix just until the dough comes together. Overmixing can cause a tough crumb.
- Assemble the bars: Scoop 1 ½ cups of the dough mixture into your prepared pan. Here’s where my technique really helps: dollop the dough all around the bottom, then use the back of a spoon or offset spatula to spread and press it into an even layer. Spread the cherry pie filling evenly over this crust, then dollop the remaining dough all over the top of the filling.
- Bake to golden perfection: Slide your pan into the preheated oven and bake for 30-35 minutes, until the bars feel set and the edges start turning that gorgeous golden brown color.
- Finish with flair: Let the cherry bars cool completely in the pan – patience pays off here! While they cool, whisk together the powdered sugar and milk to create a smooth glaze. Drizzle this over the cooled bars, then cut into 9 generous squares.
The bottom line 🎯
This cherry pie alternative transform the classic summer dessert into something manageable for home bakers. I love how the buttery sugar cookie base provides the perfect foundation for sweet cherry filling, while the simple glaze adds just the right finishing touch. Whether you’re bringing dessert to a potluck, planning a July gathering, or simply craving homemade cherry goodness, these easy fruit bars deliver every single time.
If you’re planning a July celebration, check out my July 4th Dessert Ideas for more seasonal inspiration. Cherry lovers will also want to try my no-bake Cherry Cheesecake Cups or this huge list of cherry-all-day recipe inspiration with 34 Cherry Desserts.


My family loved this!